

Saturday, October 30, 2010

Black and Red Candy Apples

Image and recipe taken from The Hive.
Red & Black Candy Apples
8-10 medium sized apples
8-10 wooden twigs, trimmed
3 cups granulated sugar
1/2 cup light corn syrup
1 cup of water
several drops of cinnamon flavored oil
1/4 teaspoon of red food coloring
1/4 teaspoon of black food coloring
Clean and dry the apples. Try to remove as much of the wax as possible. If you purchase them from your local farmer’s market then chances are they have not been treated with the food grade wax that makes then shine. Remove any stems or leaves and insert a twig into the end of each apple. To facilitate easier twig entry you can carefully sharpen the end of the twig or use a candy stick to create a guide hole. Set apples aside.
Heat and stir sugar, corn syrup and water in a saucepan until sugar has dissolved. Boil until the syrup reaches 300 degrees on a candy thermometer. Don’t go over 310 degrees or your candy burns and then you’ll be sad.
Remove from heat and stir in flavored oil and food coloring.
Dip one apple completely in the syrup and swirl it so that it becomes coated with the melted sugar candy. Hold the apple above the saucepan to drain off excess. Place apple, with the stick facing up, onto a baking sheet that’s greased or lined with a silpat. Repeat the process with the remaining apples. If your syrup thickens or cools too much, simply reheat briefly before proceeding. Let the apples cool completely before serving.
A note about the black apples: Lighter colored apples (Granny Smith, Golden Delicious) work well in making the red appear bright and glassy; darker apples like red delicious help the black candy appear as dark as possible. Muy spooky!
You can make one batch with red food coloring then re-heat the candy mixture and add black food coloring. Adding black to red will make it darker. Repeat the dipping process. Black food coloring can be found online or at specialty baking stores.

Friday, October 29, 2010
Bon Weekend - Happy Haunting
{ A photo of one of my great aunts taken in Colombia, South America in the early 1900's. }
However you celebrate, please have a safe, fun, and blessed sabbat.
Thursday, October 28, 2010
Guest Post at Lost & Fawned
I'm very excited that my friend Lindsey of Lost & Fawned asked me to write something for Halloween. I decided to share how we made our vintage looking bat picture in the foyer. It's a very easy and inexpensive project to finish for the weekend!

I'm looking forward to making more posts at Lost & Fawned in the future, and Lindsey make some guest appearances as well.
Thank you Lindsey!
I'm looking forward to making more posts at Lost & Fawned in the future, and Lindsey make some guest appearances as well.
Thank you Lindsey!
Wednesday, October 27, 2010
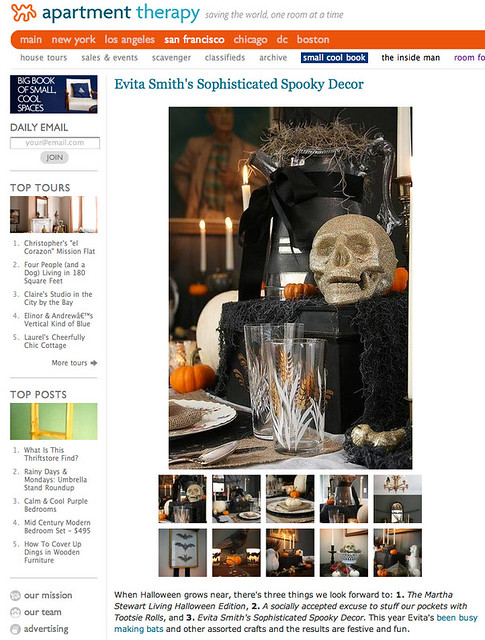
Apartment Therapy Feature!
Thanks again, Sarah Rae! If you're coming over from AT, the full post and all it's glory is just a few entries down. I can't say enough how honored I am that others like what I do when it comes to seasonal ideas. I definitely have to give props to my mother for motivating me. She's taking over for Thanksgiving.
{ Click on image to go to feature. }
I'm more than happy to answer any questions!
Thanks again!

{ Click on image to go to feature. }
I'm more than happy to answer any questions!
Thanks again!
Ooops! I did it again.
I finished this late last night and published it this morning. If you know me...you know how much I LOVE silhouettes!
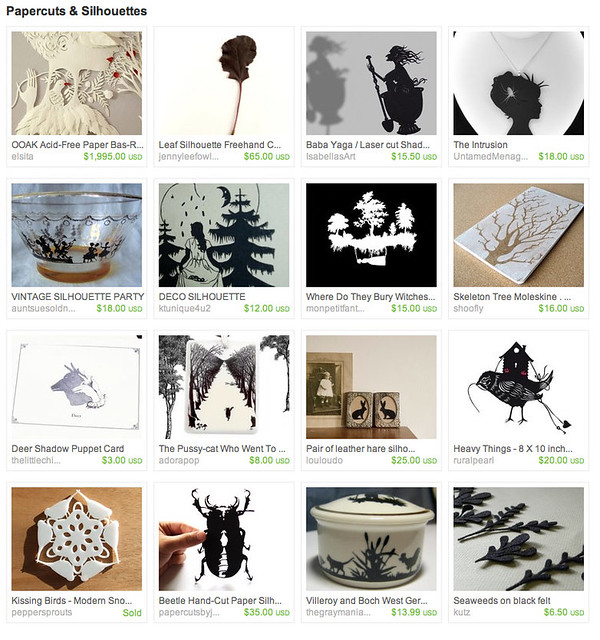
Tuesday, October 26, 2010
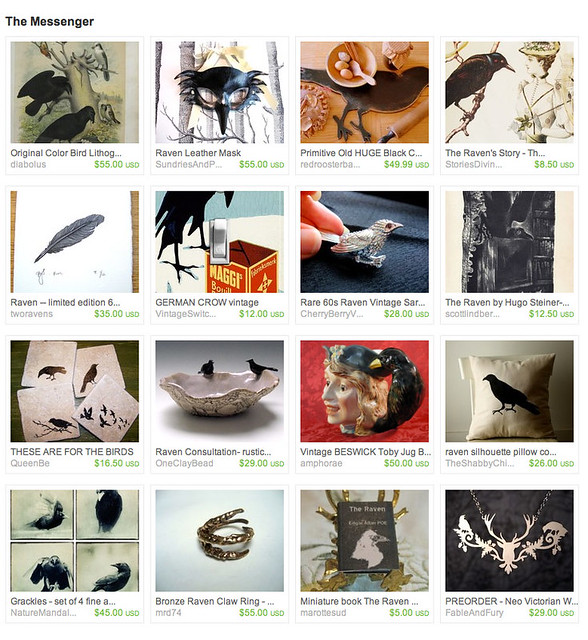
The Messenger
I really have a lot to do right now, so instead, I decided to make my first Etsy Treasury.
Monday, October 25, 2010
Happy Monday
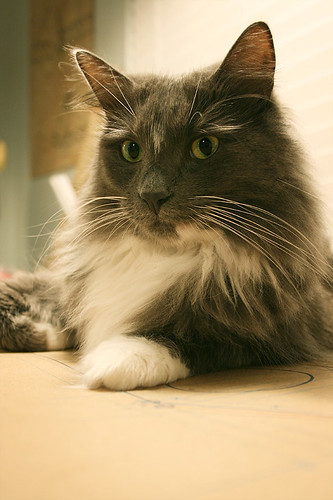
Goodness! It looks as though I brought home a little extra something from Atlanta. I went down Thursday afternoon and spent the weekend mostly horizontal. I'm up and about today, albeit a little slowly, with much to catch up on once again. I will have to say that I'm so thankful for my Netflix phone app as we don't have a television in the bedroom!
Now, if I could have only removed my head for a few days...

xoxoxoxo.
Now, if I could have only removed my head for a few days...
xoxoxoxo.
Tuesday, October 19, 2010
What day of the week is it?
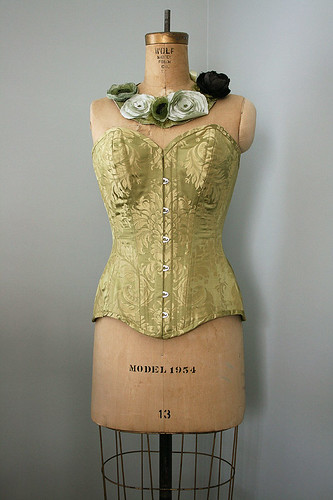
We arrived home last night from our whirlwind weekend in Atlanta. I'm still very tired today and have a ton to catch up on. It was a mostly working weekend, with ample time for silly antics at night. Michael hung track lighting for the museum where our friend Andy is the director. I am currently redesigning their website. We both lost a days work due to various technicalities. I learned that my laptop can no longer function with an external keyboard and mouse. We need to buy a used top portion and see if that will allow us to have some kind of decent portable technology. Unfortunately that caused us to miss a few goings on about town on Saturday and limited my time at fabric mecca to a mere 30-45 minutes, which is a bit cruel considering I haven't been able to step foot in Gail's in over 2 years. I threatened to drop to the floor and roll around a bit, but it was a wee bit crowded while Aileen and I were there. I managed to pick up a few pieces of fabric and I hope to get back for just a supply run next month.
This is one of a few photos taken at Aileen and Mike's place. They are two of the most extraordinary humans on the planet and I adore Aileen's style.
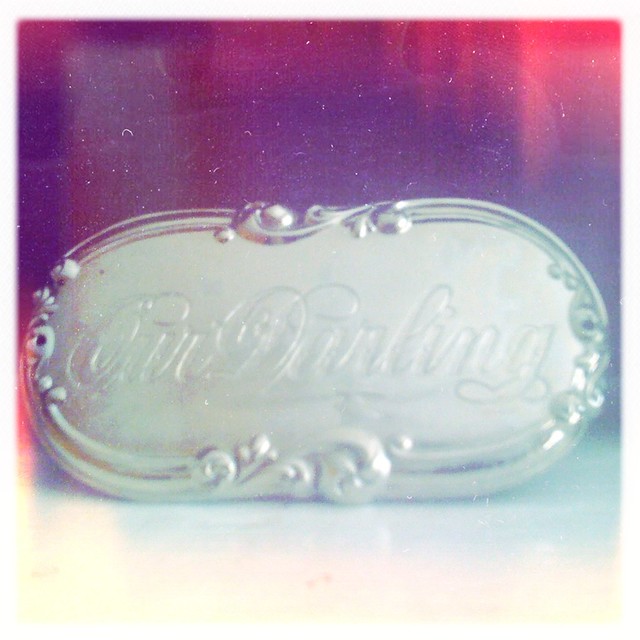
Our Darling
I hope to get more posts up about various adventures in Atlanta.
This is one of a few photos taken at Aileen and Mike's place. They are two of the most extraordinary humans on the planet and I adore Aileen's style.
Our Darling
I hope to get more posts up about various adventures in Atlanta.
Friday, October 15, 2010
Shout out at Apartment Therapy.
I'd like to post a big 'Thank You' to Sara Rae at Apartment Therapy for her shout out about the bat garland.
Keep your eyes out for another post on AT next week! Whee!
Keep your eyes out for another post on AT next week! Whee!
Thursday, October 14, 2010
Bon Weekend - Samhain preparations.
{ Thank you Sarah Rae! }
I'm posting this a little early as Michael and I will be out of town this weekend and it's not very easy posting via my phone. Today's post is focusing on our Samhain interior decorations. The main area we focused on was the dining room|foyer. Goodness, I find myself more excited than usual about the upcoming sabbat. We didn't decorate or really take part in any festivities surrounding the sabbat last year as my fathers illness was progressing and we were still in the 'trying to diagnose' phase. He was hospitalized for the final time just after.
For those of you who may be unfamiliar with the term Samhain and how I sometimes interchange it with Hallwe'en, I asked Michael to write some of the history|origins of the sabbat, and how it is celebrated. I wouldn't be surprised if more things find their way into this setting!
On October 31 we celebrate the Celtic feast of Samhain. Samhain, is Gaelic for "summer's end," and is the most important of the ancient Celtic feasts. During this time we honor the opposing balance of intertwining forces of existence: darkness and light, night and day, cold and heat, death and life. Our year is divided into two seasons: the light and the dark, celebrating the light at Beltane on May 1st and the dark at Samhain on October 31st. Therefore, the Feast of Samhain marks one of the two great doorways of our year. We believe that Samhain is the most important festival, since it marks the beginning of a new dark-light cycle. We observe this time as proceeding from darkness to light because we understand that in dark silence comes whisperings of new beginnings, the stirring of the seed below the ground. Whereas Beltane was welcomed in the summer light with joyous celebrations at dawn, the most magically potent time of Samhain is at night. The Eve of Samhain, is the most important part of our celebration. We will gather our best autumn harvest for a feast. We will put out food and drink fthat was special to those who have passed on with great ceremony, and we will leave windows, doors, and gates unlocked to give our ancestors free passage into our homes. We will offer personal prayers in the form of objects symbolizing our wishes or notes stating ailments to be healed will be cast into a fire. We will offer up many gifts in thanksgiving for the harvest. We carve "jack o'lanterns" and keep them at our doors to keep out unwelcome visitors from the Otherworld. We also dress in costumes in the tradition of our ancestors symbolizing the spirits of departed family returning home for the festival. For us this is a great time of contimplation as we come to recognize our own part in the eternal cycle of Life.
I generally love to decorate for the seasons|sabbats|holidays using family heirlooms, but it always feels more appropriate during this particular time of year.
{ All images click through to larger versions }
Wednesday, October 13, 2010
Bat Garland
More DIY projects! This is a bat garland using the same black poster board as I used for the placemats. I used the bat template provided for the Clothespin Bats project on Martha Stewart. I also made a master tracing template from velum. After I cut out all the bats, with the help of my mother, I hot glued them to black ribbon that I had in my ribbon bin. I have a couple lengths of garland, with the first being placed in the dining room, as pictured below.
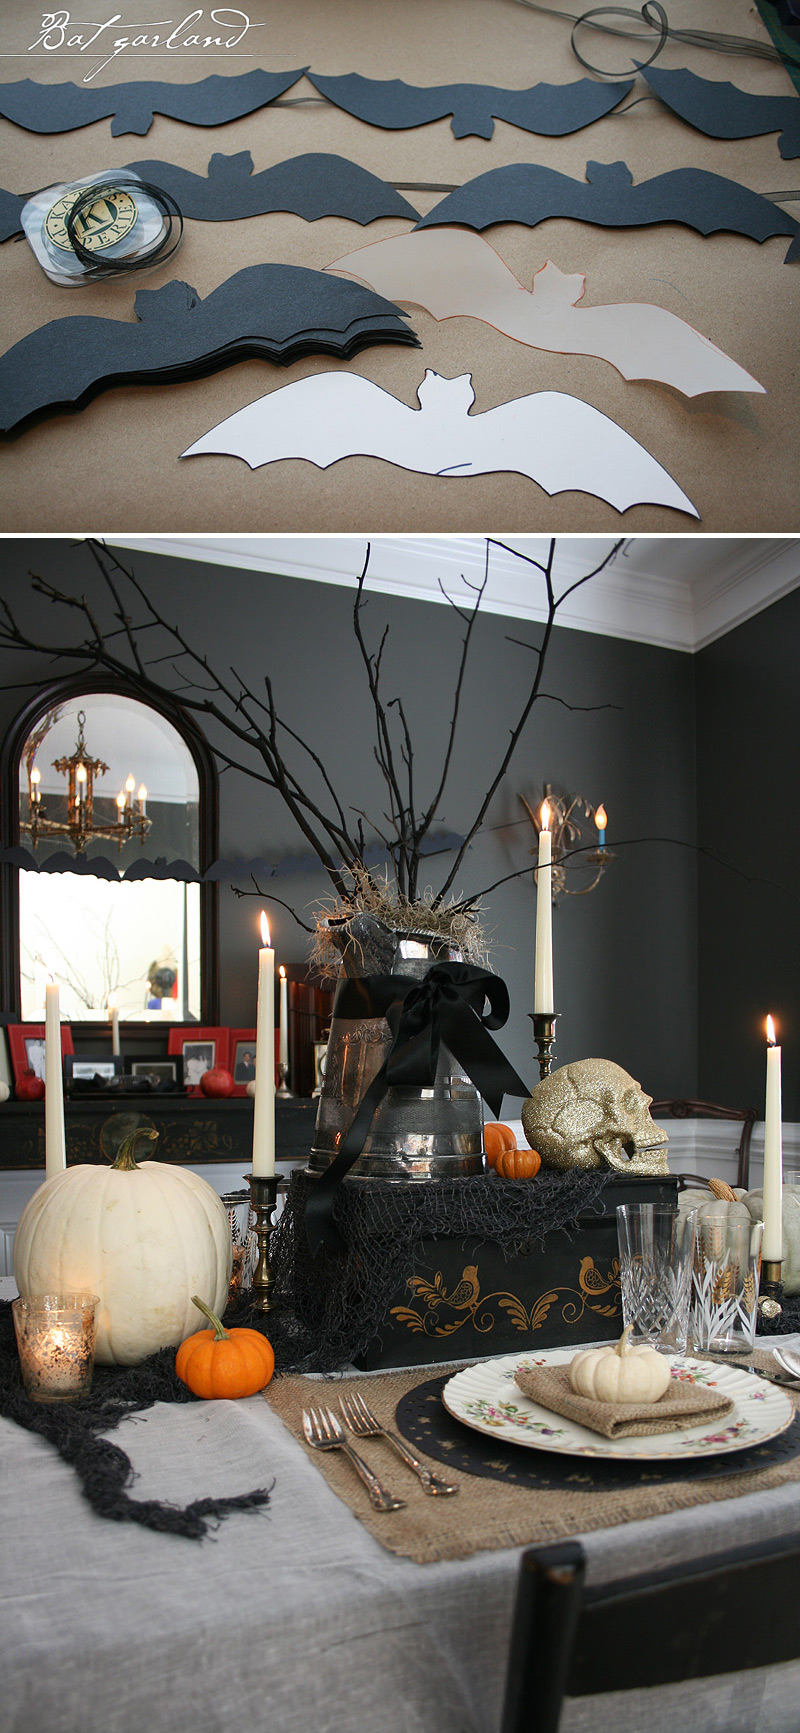
{ Click image to enlarge }
{ Click image to enlarge }
Fraidy cat 'lace' placemats.
We're working on putting the final touches on our dining room Samhain decorations and I wanted to share the placemats we'll use. I made these last night using some of the leftover black poster board, the MS cat punch we bought several years ago, and a regular hole punch. The last time I used the punch was while I was restoring my shoes for the wedding. This was a fairly fast, easy and fun project to do!
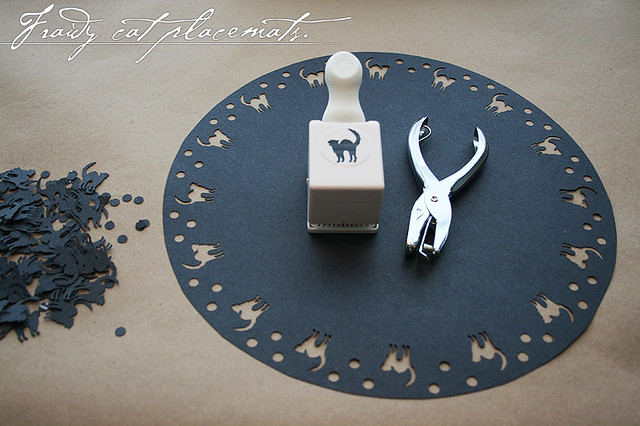
{ Click image to enlarge }
{ Click image to enlarge }
Monday, October 11, 2010
Dry Ice
Dry ice is soooooo much fun. I always look forward to working with it! These were taken on Saturday night by one of the photographers. I must give major props to Rogers Oxygen, who donated all of the dry ice for the evening!


Michael filling the beakers.

{ Photo credit: L.I.M.E. Charleston }
I'm still looking for some images of the Jacob's ladder.
Michael filling the beakers.
{ Photo credit: L.I.M.E. Charleston }
I'm still looking for some images of the Jacob's ladder.
Sunday, October 10, 2010
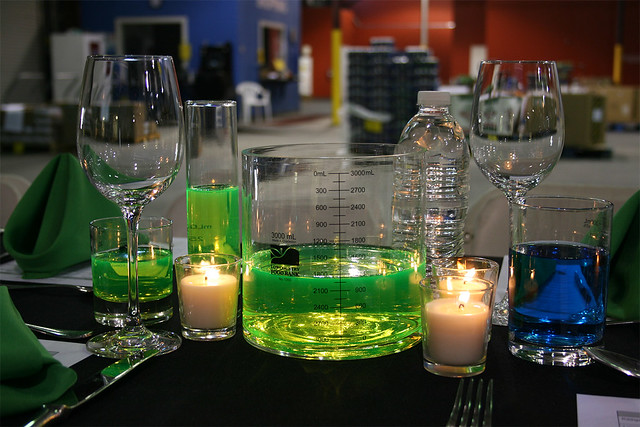
Mad Science Party
Last night Michael and I participated in L.I.M.E. Charleston's dinner. Jonathan Kaldas from Woodlands restaurant was the guest chef for the evening, and his charity of choice was the Lowcountry Food Bank. He works with molecular gastronomy so they went with a Mad Science theme for the decor and some of the entertainment. The dinner was held at the food bank itself, which is an incredibly inspiring place to wander about.
We had an understandably light budget - the less spent means more that actually goes to the evening's beneficiary. Science equipment is rather expensive to come by, so we opted to create our own. I came up with the idea of printing the measurement gradients on transparency film and Michael chimed in with the clingy stuff. I also came up with using the food bank's logo on the beakers with 'Made in Charleston' as well. I'm not sure if anyone eating noticed, but the food bank employees caught it right away and seemed quite delighted. We scoured several thrift stores and found glasses and glass candleholders that appeared to fit the bill. We bought many of those and some metal stands in hopes of creating different levels of depth. We needed more stuff and after a slight snafu Friday afternoon, I had to pick up the rest of the glassware from one of the big box stores. We also made several tent cards, some with information on Nikola Tesla, Tesla coils, and Jacob's ladders. We also made a batch of Ooze {cornstarch and water} to demonstrate the principals of non-Newtonian fluids. We named it Non-Newtonian No.8 and also made tent cards.
Once we staged the glassware, candles, tent cards and bowls for the Non-Newtonian No.8, we took a step back to look at the set up. We decided at that point not to use the stands. We filled most of the 'beakers' with neon green fluid that is simply highlighter cores soaked in water. We filled them at varying heights. Once we ran out we used a secondary color, which was blue. I thought they looked great together, and we noticed during clean up that some guests had spent time mixing the two together. Michael added some dry ice to some of the beakers during the evening.
Michael also built a new Jacob's ladder for the event. He's been meaning to do it, but just needed the right 'inspiration' to get it done. We packed several pieces from his lab including the Jacob's ladder, two small Tesla coils, a Van de Graaf generator, a wireless set up and his power units. We had originally planned to do some Tesla demos outside during the cocktail hour, but it was too bright and decidedly a little dangerous as the guests couldn't see the plasma and Michael as worried that one may stick their hands up to touch the toroid. During several points during the dinner, Michael provided some demonstrations. Diners were encouraged to come up and take a closer look and ask questions.
All in all, I think it was a successful evening. The diners appeared to be having a good time and hopefully learned a few things, and money was raised for a very deserving organization. How much was raised wasn't available at the end of the evening as the costs hadn't been fully tallied. We also gave our number out (Yup, I didn't finish Michael's cards) to a couple of people who said they'd pass it along to possibly set up at some upcoming events. If it happens, I'll definitely update on that.
And now, on with the photos! BTW - we had no idea that napkins would be green! Also, behind that blue wall was the kitchen where Jonathan and his assistant were working. There were three large windows in the wall, so it was in keeping with the 'laboratory' feel.
{ All images click through to larger versions }
Friday, October 8, 2010
Bon Weekend - with a side of awesomesauce.
Our copy of LOHAS arrived on Wednesday! I posted the mock-ups that were sent to Stacey a few weeks ago, and we were very happy with them, but it's hard to fully appreciate it until it's in your hands. The entire magazine is so, so very lovely, and we're honored that we were the one of the couples chosen to represent the concept of a 'green' wedding in this publication.

All images click through to larger versions.
All images click through to larger versions.
Thursday, October 7, 2010
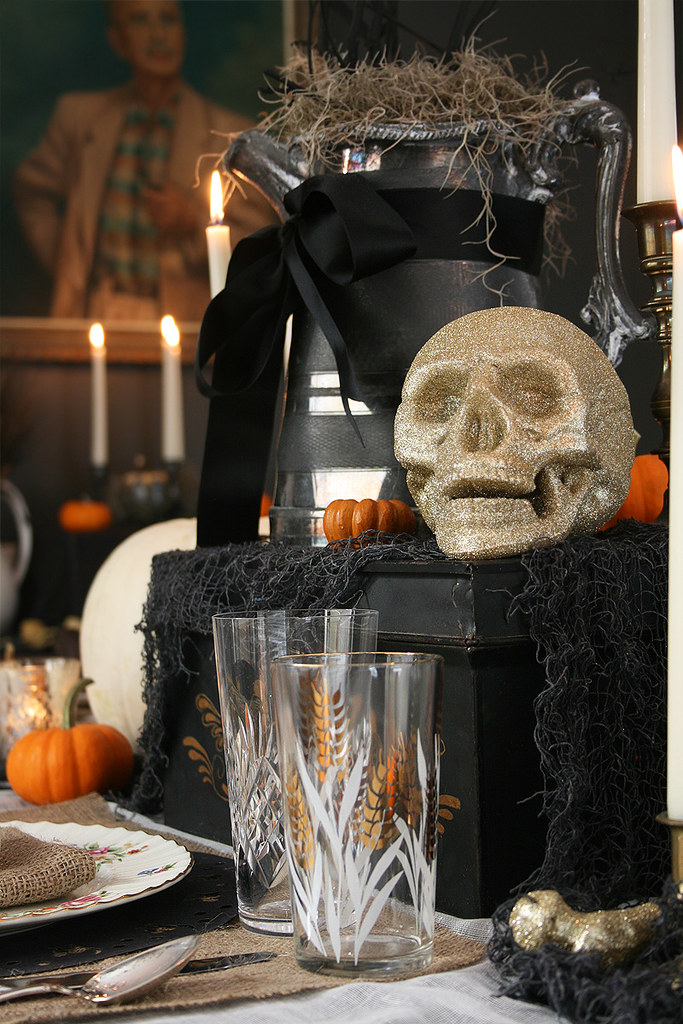
Thrifty Decorations
We're trying to maintain our mantra of reuse from previous years of decorating for the Sabbats. Our glitter skulls will make an appearance for the 4th year in a row, and others will be making return appearances. We're adding a few new items to our cache with this lovely glass candy dish. We picked it up for a quarter while thrifting some items for Saturday night. We had a couple cans of matte black spray paint in our supplies and this is the outcome:
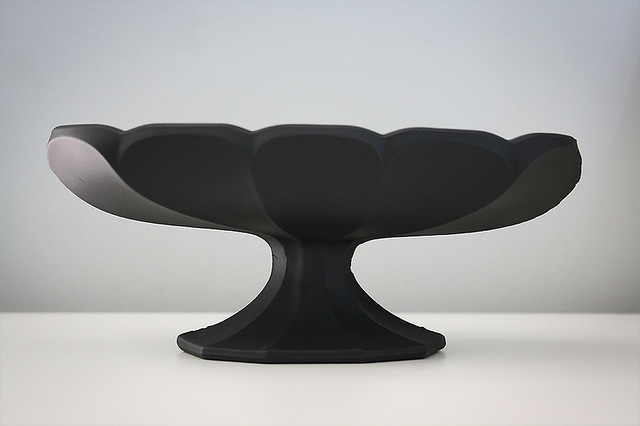
{ Click to enlarge photo. }
We also scored several lovely brass candleholders at the same store, and we're painting those as well. I'll post photos of our new tablescape soon!
{ Click to enlarge photo. }
We also scored several lovely brass candleholders at the same store, and we're painting those as well. I'll post photos of our new tablescape soon!
Tuesday, October 5, 2010
Awesome.Sauce.
I was perusing the design blogs I subscribe to in my Google Reader, when I saw that sfgirlbybay is pimping out Poppytalk's Indie Love Lookbook. I couldn't believe my eyes when one of the pages featured is the one that has my piece on it!

Bring on omgYAY.gif!
Bring on omgYAY.gif!
Jacob's Ladder
Michael is building this almost 7' tall Jacob's Ladder for an event on Saturday. That's about all I can say about it at this time. More photos after then!
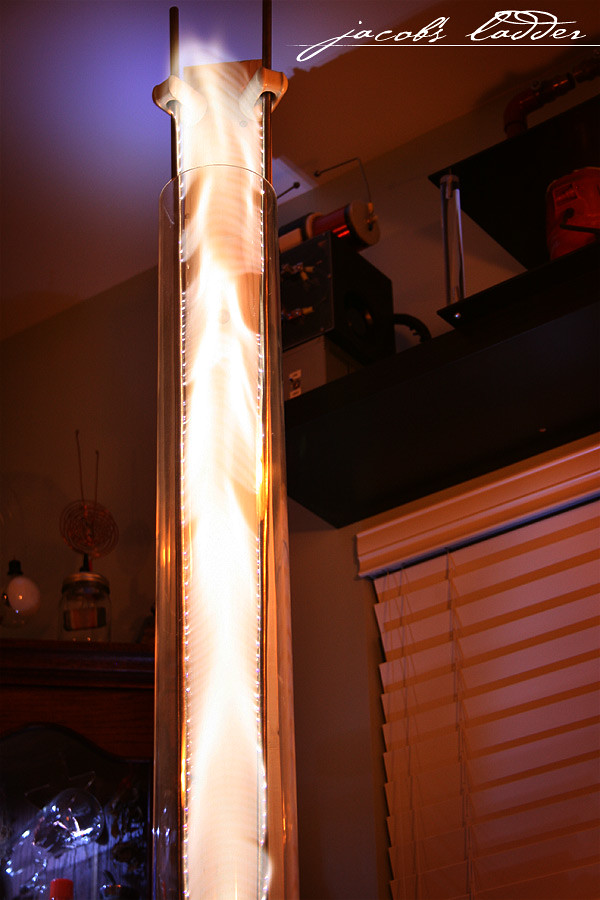
What is a Jacob's Ladder? Well, I had to lift this information from The Museum of Electricity:
'If you’ve ever seen a Frankenstein movie you have probably seen a Jabcobs Ladder or “climbing arc”. The familiar “Bzzzzzzzzzzz….snap!” sound is a staple of old horror movies.
So how do they work? First two conductive metal rods are positioned in a rough “V” shape with a slight space between them at the base. A sufficient voltage differential is provided from a high voltage transformer to breakdown the air in the gap between the rods, at which point the electricity “jumps” the gap and creates an arc. If there is enough electric current or amperage available, the arc will resemble a flame, and be hot enough so that convection begins to pull it upwards. As the arc rises it lengthens until it gets to a point where the rails are so far apart that it cannot sustain itself. It then goes out and the whole process begins again at the bottom where the rods are closest together.'
Pretty awesome stuff, eh?
Sunday, October 3, 2010
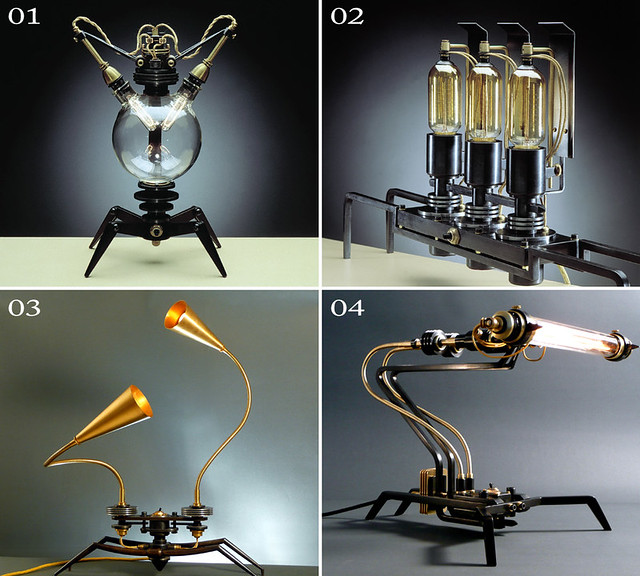
Frank Buchwald Machine Lights
I love it when image searches lead me to beautiful things. Such was the case earlier today when I stumbled upon German artist Frank Buchwald, a designer and manufacturer of furniture, lights, and objects, and his Machine Lights.
{ Click image to enlarge }
{ Click image to enlarge }
01 Burnished steel Brushed brass Textile cables Globe handcrafted glass blowing Voltage: 230 V / 120V Tube lamp 2 x 40W W. 12.2 inch H. 19.2 inch | 02 Burnished steel Brushed brass Voltage: 230 V / 110V Spirally filament bulb 3 x 40W W. 25.2 inch H. 15.0 inch |
03 Burnished steel Brushed brass Flexible brass tubes Textile cables Voltage: 230 V Tube or spot lamps 2 x 40 W W. 21.6 inch H. 31.5 inch | 04 Burnished steel Brushed brass Voltage: 230 V / 110V Textile cables, flexible brass tubes Tubular bulb, 1 x 60W H. 15.7 inch B. 16.1 inch L. 16.5 inch Weight: 15.4lb |
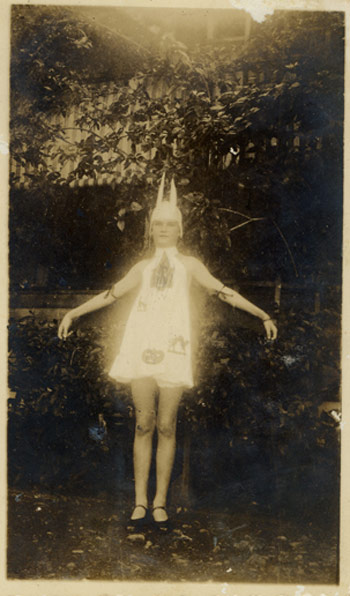
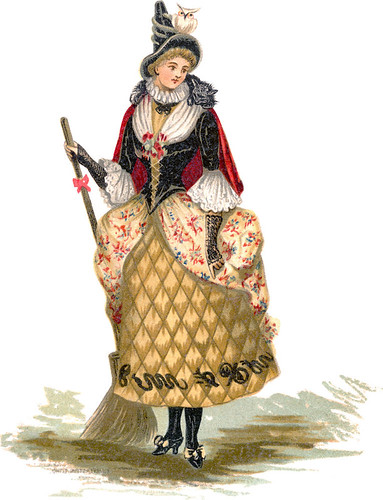
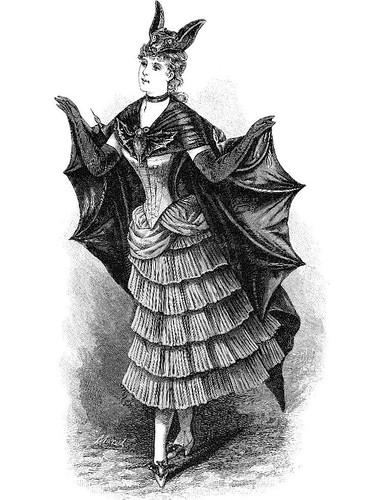
Vintage Costumes
I love vintage elements of Samhain/Halloween, and costumes are definitely a favorite! I found these beautiful illustrations via The Graphics Fairy.
{ Click images to enlarge }
{ Click images to enlarge }
Friday, October 1, 2010
Bon Weekend
Goodness, this week zoomed by! It's been an interesting week. I uploaded the Look Book for the Indie Love market { <---look left<--- } and they're featuring wonderful artists this month, as always. Please take a look. We attended the launch party downtown for Weddings Unveiled Fall issue on Wednesday night at the Charleston Library Society. It was one year ago today that the issue we were published in hit the stands. The party was very well attended, so I'm thinking that is success for them!
It's been a wonderfully rainy week! A much needed change in the weather.

{ Photo credit: Autumn Colors by Victor Eredel }
It's been a wonderfully rainy week! A much needed change in the weather.
{ Photo credit: Autumn Colors by Victor Eredel }
Subscribe to:
Posts (Atom)